

Ok, all you Kimchi lovers, I tried my hand at making it from scratch the other day, and it's really easier than you think. So if you're craving something a little spicy, ya might wanna try my Spicy Vegan Kimchi.
So first off, what is Kimchi?
Kimchi is a traditional Korean dish made up of pickled cabbage and other assorted vegetables, and its history goes back at least a thousand years. The version we know today, with Napa Cabbage and Chile Peppers goes back to the 18th century.
It's a fermented food, much like sauerkraut, as that was the traditional method of preserving food back then. That also means it's full of healthy probiotics, which is excellent for boosting healthy gut bacteria, digestion, and building our immunity.
I've always wanted to make Sauerkraut (and Kimchi), so one-day last fall when I spotted a Fermentation Kit made for Mason Jars, I grabbed it with the intent of finally making my own.
That day has finally come. The kit has been sitting in my cabinet all this time, so with the quarantine still in place, I figured now was finally the time to use it.
You don't need this kit to make sauerkraut or kimchi, but it does make it easier.
It basically consists of rubber lids that allow fermenting foods to outgas, some glass weights to keep the foods pushed down in the jars and a wooden tamper (plus a cookbook).
I found the exact kit on Amazon and I'll post my Affiliate Link below in case you're interested. I also posted the type of Korean Chili Pepper I used. As an affiliate, I do earn from qualified purchases but at no extra cost to you.
Speaking of chili peppers....
- How spicy is this?
- Do I have to use peppers at all?
- Will any chili pepper work?
You can make this as spicy or as tame as you want. I'm not sure what it would taste like without any chili, as that is one of the predominant flavors of Kimchi, but I guess you could try.
And the traditional spice used to make Kimchi is called Gochugaru, which literally translates to chile powder. But it's a specific Korean pepper that gives Kimchi its sweet, spicy, smoky taste.
So if you can, use Gochugaru. I posted the one I used above but if you have an Asian Grocery nearby, you can look there too.
It's a long process, takes 2-3 days of fermenting, you may need special equipment and ingredients, and you may not like spicy foods - so this recipe may not be for everyone.
But I love the stuff, and have always wanted to make it, so for all you hot & spicy people out there - this one is for you.
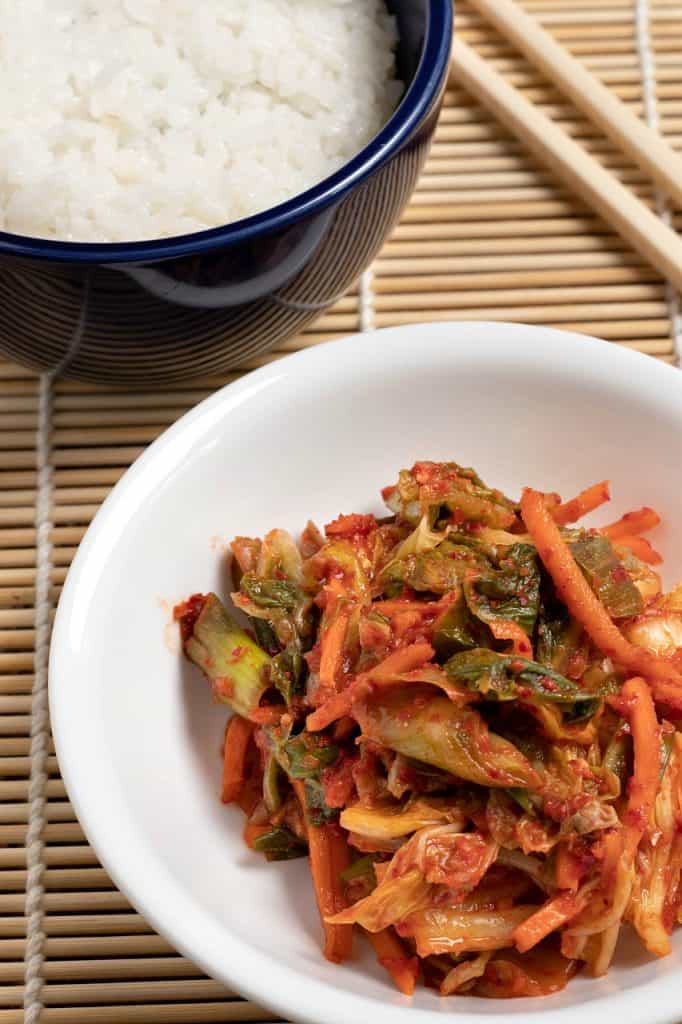
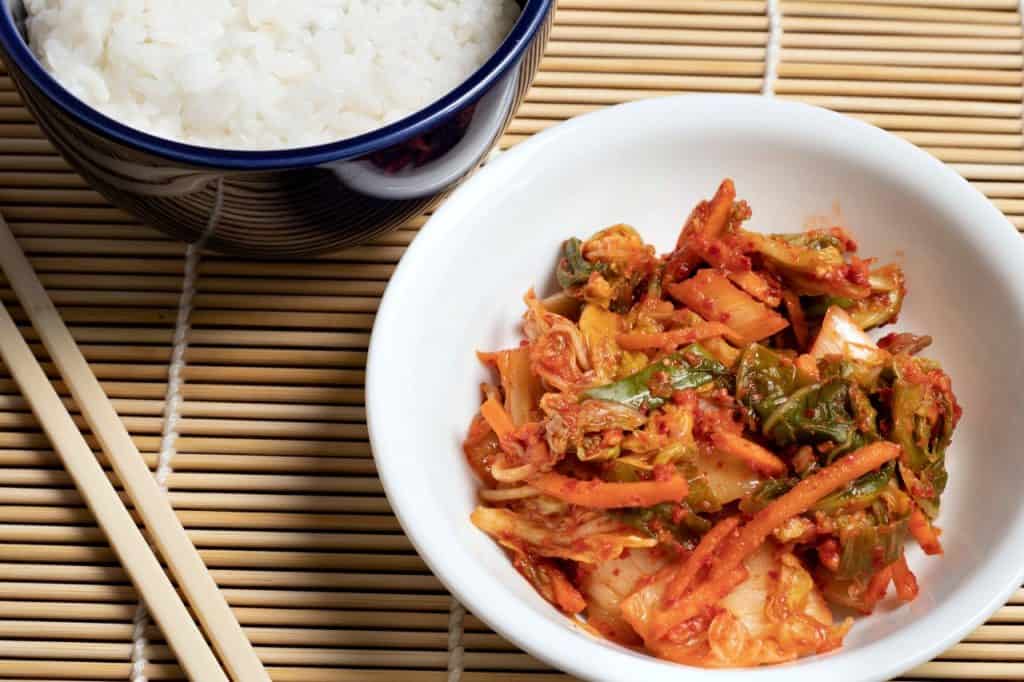
Spicy Vegan Kimchi
The Cabbage
Start with a large head of Napa Cabbage and one of the biggest bowls or pans you can find.
Cut the cabbage in half lengthwise, and again into quarters, then chop it up into bite-sized pieces. Add 1 cup of water and mix it all thoroughly so every piece is damp.
Then sprinkle 6 Tablespoons of KOSHER salt over it and mix it again.
I know that sounds like a lot of salt, but it's going to be rinsed when we're done - so no worries. And use coarse salt, like Kosher Salt, not the iodized table salt.
Now, let that sit for 2 HOURS, and give it a quick toss or massage every 30 minutes. You'll see that salt draw out a lot of moisture.
The Veggies
I used an entire bunch of green onions, and a bag of pre-shredded carrots I bought at the store. Use as much carrot as you like but I used about 2 cups.
Daikon Radish is also commonly used and by all means if you can find it, replace 1 cup of the carrots with that. Make sure to chop it up into the same sized matchsticks as the carrots.
Place your veggies into another bowl, and set aside.
The Sauce
Now, finally, the sauce, which is what makes the recipe. We start with a cup of water, but we want to flavor the water.
Since non-vegan Kimchi uses Fish Sauce, I used a piece of Kombu seaweed that I had in my cabinet. If you have Wakame, Dulse, or Nori - you can try that too. Use what you have or what you can find, and if all else fails - you can skip this part but it does add that funky flavor that makes Kimchi what it is.
I also used mushrooms. Four or five Shiitake Mushrooms would be good. but I had Baby Bellas so that's what I used. We just want to boil them (and the Kombu) for a minute or two to flavor the water, then we can toss them out. I added the mushrooms to my veggie bowl.
Now that our water is flavored, we need to thicken it.
Traditionally, a Sweet Rice Flour (or glutinous rice flour) is used. I used normal white rice and ground it into flour using an old coffee/spice grinder. We need 2 tablespoons. (I understand regular white flour will work too).
Add that to your water, whisk constantly, and heat until it thickens into a paste. If it doesn't thicken (mine did not) add a slurry of 1 Tbs cornstarch or arrowroot and water until it does.
Let that cool completely while we prep the remaining ingredients for the sauce.
To a food processor (or maybe your blender) we want to finely mince ½ of a white onion, an inch-sized piece of ginger (or 1 Tbs), and about 6 medium-sized cloves of garlic. Take this mixture and stir it into your cooled rice porridge.
To add some sweetness to our porridge, add 1 Tbs Maple Syrup, and for some saltiness, I added ¼ cup low-sodium soy sauce.
Mix that well and now it's time to add our chili flakes. Like I told you, I like spicy, so I added ½ cup of Gochugaru. You can always start with ¼ cup and add more if you want.
Making the Kimchi
Back to our cabbage - using a colander, drain the cabbage and put it back into the bowl. Rinse well then drain again.
Repeat this 4 or 5 times to get all the salt out of the cabbage. Then squeeze as much remaining moisture out of it as you can. Let this finally drain one last time for at least 30 minutes.
Stir in the veggies and mix well.
Finally, stir in the chili porridge and mix. I used my hands and got in and there and really massaged that chili onto as much of the cabbage I could. I mean I mixed it for a good minute or two.
Remember: You now have hot chili on your hands - do not rub your eyes and wash your hands thoroughly when done.
Now we simply pack our jars.
This recipe makes about ½ gallon of Kimchi. I used a single ½ gallon jar but you could use quart jars, pint jars, whatever you have on hand.
Leave some space at the top as this will expand as it starts to ferment.
And DO NOT screw the lids on tightly! Fermentation creates CO2 gas, which will build pressure in a sealed glass jar. We're not making exploding Kimchi bombs here.
Leave the lids on loosely, or use the rubber lids in the kit I mentioned, or a piece of cheesecloth, something that will let that gas bubble out.
I also recommend setting the jars inside a bowl or plastic container, in case any liquid bubbles out. Some people even seal the jars inside zip-lock bags, for the spills and the smell.
Note: Your whole house is gonna smell like Kimchi now 🙂
Let those sit on the counter to ferment. You can taste it after a few days and see how you like it, but you can easily let it ferment up to a week. Then transfer it to your fridge where it will keep for months.
Note: It will still ferment slowly in your fridge, so remember to not go too crazy when tightening those lids. If you see any bowed upwards, ya might want to burp it every day or so until it stops.
There ya go. That's my weird, crazy-long, seemingly complicated recipe for the week.
I know, not a normal BNV comfort food kind of recipe, but as I said - I had this kit sitting here gathering dust and I really like Kimchi - so .......what's a guy to do? MAKE KIMCHI!
And you can be sure sauerkraut and pickles will be coming up soon.
Hope you enjoy,


Spicy Vegan Kimchi
- Prep Time: 4 hrs
- Total Time: 3-4 Days
- Yield: ½ gallon 1x
- Category: Side, Condiment
- Method: Fermentation
- Cuisine: Korean, Asian
- Diet: Vegan
Description
A spicy mix of Napa Cabbage, Carrots, Green Onions, and Korean Chile Flakes to satisy any spicy food lover.
Ingredients
Cabbage
- 1 large head napa cabbage
- 1 cup water
- 6 Tbs salt
Veggies
- 1 bunch green onions
- 2 cups shredded carrot
Sauce
- 1 cup water
- 1 palm-sized piece of kombu
- 4-5 baby bella mushrooms
- 2 Tbs rice flour
- 1 Tbs arrowroot or cornstarch (if needed)
- 1 Tbs maple syrup
- ½ white onion
- 6 cloves garlic
- 1 Tbs miced ginger
- ¼ cup low sodium soy sauce
- ½ cup gochugaru korean chile flakes
Instructions
- Wash cabbage, cut into quarters lengthwise, then bite-sized pieces, and add to a very large bowl
- Add 1 cup of water and 6 Tbs salt and mix thoroughly
- Set aside and stir/massage ever 30 min for 2 hrs
- Chop green onions, and mix with carrots in a separate bowl - set aside
- Add kombu and sliced mushrooms to another cup of water - bring to boil
- Remove kombu & mushrooms and add rice flour - whisk to thicken.
- If porridge does not thicken, add arrowroot or cornstarch
- Set aside to cool.
- Mince onion, garlic, & ginger in food processor
- Add to cooled rice porridge along with maple syrup and soy sauce
- Stir in chile and mix thoroughly
- Drain cabbage and rinse thoroughly - at least 4 times
- Let drain completely at least 30 min
- Thoroughly mix cabbage, veggies, and sauce.
- Lightly pack into canning jars, covered loosely
- Let ferment on counter 3-5 days then store in fridge.


Brenda
It’s all finished and sooo yummy. I like spice but not too much so I used 1/3 cup and it’s just right for me. One note: make sure you leave a couple of inches of headspace in the jars. I didn’t and ended up having to put them on a tray to catch the overflow. Next time!! I’m finding it’s good to have when I apart craving something I shouldn’t eat. Satisfies that need for me in a healthy way. My sour kraut is now fermenting lol
Geoffrey Levens
Looks GOOD! On my short list. And one tip I always like to pass along since I found out the hard way. This is one good use for oil--if you do forget and touch your eye(s) or get some pepper juice splash, rinsing with water will NOT help because the burning part is oil based. If you rinse your eye with just a little oil it makes the burn go away instantly! Also works if you accidentally get essential oil of some kind from your finger to your eye.
Carole Kapsner
Gonna give this five stars.... because it pretty much matches my recipe... except for the mushrooms. I'm waiting for my order of Korean red pepper flakes to arrive.... then it's KIMCHI for ME! I absolutely crave it....all that sour, salty, hot mmmmmm.. Will add some mushrooms when I make the next batch...should be a nice umame addition.